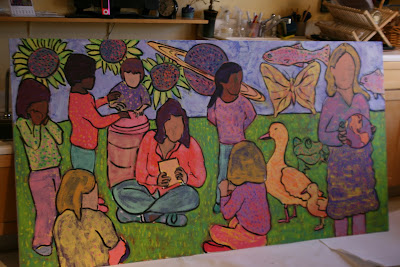
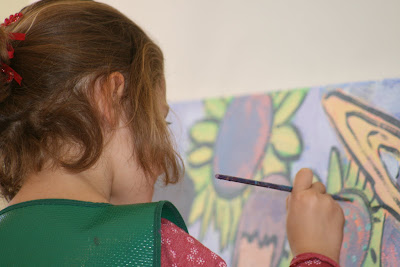
 Tony Ortega spent five days, spread over the past two weeks, working with our students on two beautiful murals that will soon adorn the walls of our school. His technique with the children is lovely to watch. The children have truly painted the murals themselves, with Tony acting as a guide. The effect is amazing but perhaps even more lovely is the feeling of ownership that each child displays after having worked on the murals. As they pass the paintings, they pause and point out the areas they painted, with enthusiastic pride.
Here's a quick review of the process:
Tony began by introducing himself to the students during morning circle time and answering a few of the children's questions.
 Next, we invited students, two at a time to begin working with us in the studio. Tony invited each child to the paint mixing table and measured a few paints into a recycled plastic container, each time asking the child to "guess" what color might emerge.
  The student than used used a wooden tongue depressor to thoroughly mix the new color.
 With a thorougly mixed container of paint the student was ready to paint on the mural. We began by filling the various outlined shapes with blocks of color, often complimentary or secondary shades, to form the base of the painting (so faces were green and hair was purple).

 After the base coat of color was in place, we began using a dry brush painting technique to overlay a second layer of paint while maintaining some of the original color.
 Finally, students used pointillism techniques to add small dots and dashes of color to the painting.
 Then Tony finished the murals by adding black outlines and overlaying the whole piece with a UV retardent varnish.
  The entire process was an amazing experience for students and staff alike. Thank you so much to Tony Ortega for sharing his talent with us in a unique and inspiring way AND thanks to our families without whose support this wouldn't have been possible.
 Please come by after Thanksgiving break to see the new murals installed.

WOW!! The mural and photographs recording it's creation are fabulous! I'll be stopping by school to check out the installation.
ReplyDeleteI am so inspired by all the tales of artistry on this blog! Having young ones who home-school, I am ripe for all of these lavish ideas. Thank you for recording your process, and give thanks for your incredible mind which overflows with lush poetry for the eye!
ReplyDelete