About Me

My photo
I am the studio teacher in Zach's Place Studio, an AMS Montessori teacher, an artist, a mother and much more.
Showing posts with label projects. Show all posts

Tuesday, November 16, 2010

weeks 9 and 10- A visit from Tony

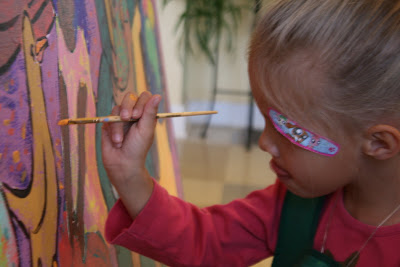
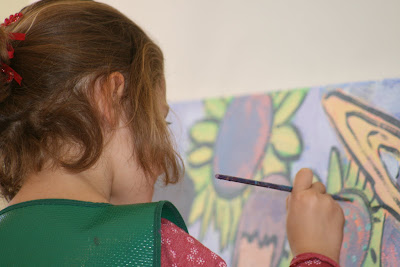
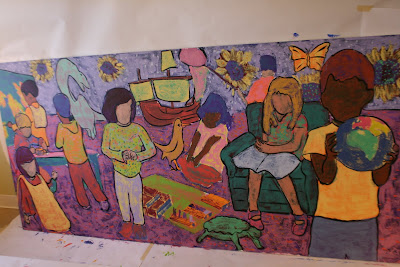
Tony Ortega spent five days, spread over the past two weeks, working with our students on two beautiful murals that will soon adorn the walls of our school. His technique with the children is lovely to watch. The children have truly painted the murals themselves, with Tony acting as a guide. The effect is amazing but perhaps even more lovely is the feeling of ownership that each child displays after having worked on the murals. As they pass the paintings, they pause and point out the areas they painted, with enthusiastic pride.

Here's a quick review of the process:

Tony began by introducing himself to the students during morning circle time and answering a few of the children's questions.

Next, we invited students, two at a time to begin working with us in the studio. Tony invited each child to the paint mixing table and measured a few paints into a recycled plastic container, each time asking the child to "guess" what color might emerge. The student than used used a wooden tongue depressor to thoroughly mix the new color.With a thorougly mixed container of paint the student was ready to paint on the mural. We began by filling the various outlined shapes with blocks of color, often complimentary or secondary shades, to form the base of the painting (so faces were green and hair was purple). After the base coat of color was in place, we began using a dry brush painting technique to overlay a second layer of paint while maintaining some of the original color.Finally, students used pointillism techniques to add small dots and dashes of color to the painting.Then Tony finished the murals by adding black outlines and overlaying the whole piece with a UV retardent varnish. The entire process was an amazing experience for students and staff alike. Thank you so much to Tony Ortega for sharing his talent with us in a unique and inspiring way AND thanks to our families without whose support this wouldn't have been possible.
Please come by after Thanksgiving break to see the new murals installed.

Thursday, November 4, 2010

week 8 - Tree Project- Angelina

PRE-PROJECT

How the tree project emerged.

While in the studio exploring leaves three weeks ago, a conversation emerged with three students from the morning Ward-Hobbs classroom. The students involved were Laurel (L) age 4, Amelia (A)age 5 and Joseph (J) age 5. The conversation proceeded as follows:

Angelina Have you noticed any changes happening in our trees outside?

J The leaves are changing colors. The leaves are dying because they are turning so hard and the rain is making them change colors.

L The leaves were a little bit changing purple. I saw some purple leaves on the ground and on the tree. I saw a leaf changing rainbow: orange, pink, purple and green. I saw leaves change turquoise. I think they’re all gonna fall to the ground. Can we make a tree of leaves? It would look like a real tree. We could glue leaves on it, then we need to make a big circle of brown paper.

A Yeah! We could make it out of brown paper.

J Real trees have wood.

L Can you get some wood Angelina?

Angelina Yes, but what kind of wood do you want?

L A branch, we could hang it from the ceiling!

J So it is standing up like a tree. We have to make the sky higher, cuz the sky is air.

A Water makes air.

L Really hot water makes air.

A Yeah!

Angelina What kind of leaves would you like to hang from your tree?

L These leaves! (points to the ones on the table)

Angelina Okay. These may change by the time we make our tree. (I show her an old leaf and how it is brittle)

L We don’t want breaking leaves.

Angelina Would you like to hang some of your drawn leaves on the tree?

(Amelia, Laurel and Joseph all say “NO!”)

(I told them about a technique where leaves are preserved in wax so they maintain their color and remain intact.)

L Do you have wax?

Angelina No but I can get some.

J YEAH! Then we will make our tree.

A With leaves falling down.

L Can we do it today?

Angelina We will have to wait for another day.

L Okay but you get wax and a branch

Angelina And you can start looking for leaves.

PROJECT PREPERATIONS

My sons and I went hiking and found an interesting branch near a creek bed above Morrison. I brought it into the studio and asked Laurel, Amelia and Joseph if it would work. They all agreed that it would. Next, I tried out laminating the leaves and found they retained their color well, while the veins and texture remained evident. I asked the three students involved if we could use laminated leaves rather than waxed leaves and they agreed that we could. I selected an open studio day and we made an appointment to meet.


POST PROJECT

Angelina What did you notice while making the tree project?

L I saw rainbow leaves!

J The colored leaves

L We glued them on with honey glue, (deep intake of breath) it looks like those big yellow trees (points at a cottonwood tree outside). Maybe they’re made with honey glue too!

A Yeah! Maybe we could make a tree outside now. We would do it just like this (pointing to the tree).

Angelina How do you think the leaves outside stay on the tree?

L They’re connected to the branches without any glue, they hold onto the tree branches.

A Their arms are really tired and that’s how they fall off.

L They let go like this and lay on a bed.

A Yeah, like an acorn bed.

L But flat like this (slaps her hands together).

A A smooshed acorn bed with mud.

Angelina How will they look differently in the winter?

L Maybe they will turn white.

A In winter we could throw snow on the tree.

J The trees are gray in winter.

Angelina Is there anything else you would like to say about our tree project?

L We hanged it up by string.

A But real trees spread up and POP! Spreading leaves, spreading trees! Growing!

J And I think we should bring more leaves in and stick them on the tree one we made.

Thursday, October 14, 2010

week 6- From line to leaf- Angelina

The wonder of Autumn through the eyes of a child is something many of us may take for granted. The brightly changing leaves are a thing of magic and breathtaking majesty. A child in our program is of an age that he or she may only remember one or two forays into the colorful world of Autumn. It is our hope, as partners in learning, to nurture this appreciation of the natural world as each child develops and matures into a responsible steward of our planet. Partly with this in mind and party with giddy excitement for the seasons, we continued our exploration of line to include an exploration of leaf.After bringing in overflowing baskets of fall inspirations, we began our inquiry into the great changes taking place in our surroundings.
When we approach a new topic we start with a question, many of them beginning with: "I wonder...", "Have you noticed...". We pursue the child's learning with additional questions, like, "Why do you think that happened?" or "What might happen next?". The teacher, as participant, researcher and observer, records each answer.
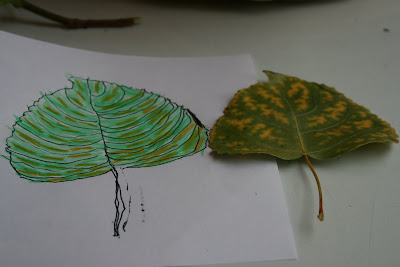
I am always startled by the freshness and insight of their ideas and explanations. While we talk, we often draw.Some students traced the leaves while others made free handed representations.This child created an elaborate piece, carefully placing each leaf on the page after removing it from its stem and tracing around its curving form.As the children worked together, conversation ebbed and flowed, during this process several possible ideas emerged for a project. One centered around creating a tree for the school, with real leaves falling to the ground. Another idea involved pressing leaves into sand or mud to create a collage of leaves.Still other ideas involved categorizing leaves, or capturing them before "the fall".Once the rains cleared, students began sojourning onto the playgrounds in search of a particular leaf to explore and draw. Many of the older students chose to make leaf books, each page a record of a particular leaf and the child's process of looking.One student became very intrigued by the idea of ephemeral art in the style of Andy Goldsworthy. He spent over twenty minutes immersed in Goldsworthy's book, Passages, and spontaneously began drawing images from the pages, creating a collection of "art ideas" to add to his leaf book.

We have sent home a project for our community consisting of a brown paper lunch bag and an invitation to fill it with signs of the season. Next week we plan to begin categorizing these items for the many projects and explorations ahead.

Thursday, October 7, 2010

Parents helping with projects - Kathryn

For the first weeks of school, we discourage parents from visiting their children at school because seeing a parent during those first weeks of becoming used to school again can be a bit unsettling for a young child. But those weeks are past, and Children's Garden has been filled with moms helping groups of children with art projects. We have been so impressed with these moms - they "get" the atmosphere we are trying to create here - calm, relatively quiet, respectful of the children, slow-paced and focused. Yesterday as I walked through the classrooms, small groups of children huddled around tables filled with paint, beads, and pottery, working with a parent or two to complete a project. It reminded me of why we bring art into our school at all. There is something magical about the power of creating a thing of beauty, and for a child, that could be nothing more than a line on paper, a spot of color on canvas, or a string of beads on a wire.

The Toddlers: Here are a few photos of the toddlers painting small wooden objects. They are between 18 months and 3 years old, so the tools themselves are fascinating, hands become tools, for some there is the temptation to taste the paint (non-toxic is essential!!) and the paper beneath the figures also gets a good dollop of paint.


The Extended Primary: The extended primary children, all close to or by now five years old, have mastered most of the tools we use in the studio. They are beyond the exploratory stage of the toddlers, and are ready to do fairly refined and sophisticated work. Interesting to me is that both toddlers and five year olds fall into concentrate easily. The flow experience knows no age boundaries.

These children, with the help of two moms, are stringing fairly small beads of their own choosing, following a pattern of their creation, and then repeating that pattern several times. Obviously they are loving what they are doing, and because of the level of concentration, will return to their next work in the classroom calm and satisfied.


Thursday, September 30, 2010

XP qualities of line- week 4- Angelina

The older students (extended primary or XP) have independent studio time every Wednesday afternoon. This week we met for a group discussion at our central tables. Kathryn and I were interested in bridging the exploration of line with the materials in the montessori environment. I began by asking a small group if they could think of any material in their classroom that might represent a "thick" or "thin" line. They came up with several possible ideas, until one student sat upright from an immersion in thought and said, "the brown stair". YES! They brought the thickest stair and the thinnest stair to the table. We spent some time examining the qualities of thick and thin, broad and narrow, "fat" and "skinny". Then I introduced them to a bevvy of black drawing tools on the table and said, "Do you think we could make lines that are thick and lines that are narrow?". The students were eager to experiment and soon discovered that certain tools were better for thin lines than thick ones and vice versa. I showed them how to run a crayon on its side along the smooth surface of paper, to make a very thick line and how to change the angle of a marker to alter the width of the line. Several students passed through the studio, each one experimenting with the thickness of line and variety of tools.

One boy accidentally discovered that he could, "make thin lines using thick lines". He was drawing with a ball point pen on white paper atop a drawing mat (which provides a slight cushion). He then turned the paper over and exchanged the pen for a charcoal pencil, experimenting with thick black lines. The charcoal residue began to adhere to the impression of his drawing from the reverse side of the paper. Without a word, he quickly grabbed the black crayon and rubbed the surface of the imprint. He looked at his work amazed and brought it to me. I in turn expressed my interest in his process and he demonstrated his findings to everyone gathered at the table. We were all excited by his discovery and soon several students were independently exploring his technique, with his guidance wherever needed. He was visibly satisfied by this opportunity to share with his classmates.

Later, I asked another group of students if they could think of some work in their classroom that was really long. We came up with lots of great ideas and then I offered a possible hint, "Is there something long and red in your classroom?". A unanimous chorus of "the red rods" sounded and two eager students hurried off to retrieve the longest red rod and the shortest red rod. (For anyone unfamiliar with either the red rods or the broad stair, they are standard Montessori sensorial materials that isolate length and width respectively)
.
After exploring and comparing the longest rod and the shortest rod, I asked if anyone was interested in trying to draw lines that are long or short. It would be an understatement to say that the students were eager. They were positively passionate about these materials which many of them began using more than two years ago. Several students decided to trace the rods and then fill in the long rectangular shape that resulted.
Another student chose to begin tracing each of the red rods on paper. At one point he called the second red rod "the two rod", with an obvious understanding of the similarity between the red rods and the number rods in his classroom.
This student, pictured below, began by tracing the shortest rod, but quickly progressed to filling in the drawn shape and elongating it into a bat, "a thick line". He then drew "thin lines" to create a baseball. Beneath the image he began carefully and deliberately to draw a scoreboard. This process fascinated him and after some effort, he glanced up and announced, "I'm making a pattern" and he was!
Another child chose to make one long, rambling line paired with a host of small dots.Several students commented on emerging patterns in their work. This student was making a color pattern. After a brief conversation with the XP teachers, I discovered that they have been discussing pattern in class and how line can be repetitive. This could be a good studio exploration for another day.

line and shape- week 4- Angelina

Our "slow down" week in the studio, certainly didn't imply a slowing down of student activity. The students were eager and excited to experiment with the many materials they had been introduced to thus far, including this malleable sculpting wire which progressed from lasso to pear and below you can see it's final incarnation as a bird. In the picture above, two students discovered that if two sculpting wires were joined together, a very long line resulted.
This week we initiated a daily drawing time, where each student draws something, possibly something memorable from their morning, on a 6x6 sheet of white paper prior to starting other studio activities. This is a great opportunity for us to discuss their day and it is a nice way to transition from the classroom into the studio. We will be keeping these drawings to catelog individual progression throughout the year.
The light table and projector continue to be hot spots of activity and creativity.
The students are utterly entranced by the projector, its mechanics and the magic of light transfered onto the wall. This is an obvious interest worthy of some consideration for a future project.
Several students blended colored shapes and lines to create interesting patterns and compositions. Some of the photos were shown to the students who created them, in an effort to prolong their process and allow for some elementary discussion of composition, pattern and balance. The students were interested in the photos and very willing to comment on their process and expression.
The students remain interested in line and have begun a chart of lines using some colored sculpting wire.
This activity still holds the interest of the students and several have expressed a desire to continue exploring types of line.

Next week, we plan to watch as this study of line continues to evolve adding the easel, black paint and several sized brushes to the mix.
Stay tuned.


Sunday, September 26, 2010

Observing a moment of curiosity - Kathryn


Angelina and I, in the spirit of the Reggio approach, are spending a great deal of time talking together about where to go next with the children, trying to base our ideas on what we see they do and what we hear them say. We've also solicited ideas from other teachers who have done this before and who know the children in the classrooms well. Unlike the Montessori approach, there really is no "right" way that we have been taught, so we imagine and think, allowing ideas to pop out fairly unformed to see if they will stimulate more ideas.

Some of my thoughts this week have been: this is harder than it looks; one idea might work well with one group of children and be a dud with another group; older children are more capable of understanding concepts like line and shape; and thus give us more ideas; and, did I say this is harder than it looks?

Post script: When I wrote earlier that it was harder than it looks, I realize now that what I mean is that letting go of one's expectations as a teacher is what is hard. The children do beautifully in the studio, but sometimes I have expected or hoped for something that did not happen. That also happens in the Montessori classrooms. It's much more, or entirely more, about the teacher than it is about the children. The previous photos illustrate my point a bit.

This little boy was not in the least bit interested in exploring shape with the overhead projector. He wondered how it worked! I tried once or twice to show him some possibilities with color, light, shadow, and shape, but no, he always went back to figuring out how it worked. Obvious from his face, he is engrossed and focused. As teachers, we try to protect those moments of concentration for every child, wherever they occur.


Thursday, September 16, 2010

lines- extended primary- Angelina

You may remember from last week that a few of the older boys posed an interesting question, "How long can you make a line?". There were alot of theories and ideas for possible experiments to explore this idea. A popular experiment centered around chalk and sidewalks. So this afternoon, armed with sidewalk chalk, a camera and a clipboard for recording data. I invited the same group of boys who orginally posed the question to be the first to try out thier experiment. After a short discussion outlining some safety precautions, they decided to begin at the most northern corner of the sidewalk in front of the school. They each wrote thier names and began
drawing a line. One student made zigzag lines, one made staggered lines, another made "water" lines and the last sped down the sidewalk trailing chalk with enthusiasm. After about 20 minutes of drawing and several pieces of blunted chalk the students were exhausted and finished. We then decided to measure the lines and after some discussion we agreed on counting the segmented sidewalk squares. The longest line terminated in the sixty-first square. We sat under a crab apple tree surrounded by fruit and discussed our findings. They agreed that drawing a line was harder than they first imagined, but still expressed the merits of drawing a line to the nearest ocean or to Australia, or Antarctica. They left, thirsty and tired, to return to the classroom.
The next students who decided to join the line experiment happened to be a group of four girls. These girls exchanged shoes for slippers and followed me outside. We used the same protocol and discussed safety before deciding on our starting point. The girls were eager to begin drawing at the same spot the boys chose, with an obvious interest in out distancing the "boys". After fifteen minutes the girls were visibly hot and tired. They expressed their frustration at not having made a line as long as the line one of the boys had made. We counted the squares in their lines and discovered that the longest line was thirty-five squares. We too sat beneath the crabapple tree to reflect. At no time did I ever compare the two groups work or make any suggestions. I listened actively to their frustration and asked, "Do you think you might be able to make a longer line some other day, when you are less tired?" and "How?". Soon two of the girls excitedly exclaimed "We could work together!"
One girl said, "Yeah you could work on my line!""
Another countered, "No you could work on my line!"
This continued for a while until another member of the group suggested, "What if we worked on the longest line together!"
They unanimously turned to me and said, "Can we do it now!"
I asked if they were too tired and they assured me they were not. I offered the bucket of chalk and they were off.
Soon they were working as a team with one child running ahead to make a portion of the line and another working to connect the segments. They made the chalk line a full city block long and a total of one hundred and six squares. They were visibly excited, proud and invigorated. When we reflected on the process they were eager to announce "We won!". I said, "I'm not sure we were competing against anyone, BUT we did learn that you can do a lot more than you ever thought possible when you work together". Smiling, arm in arm, they returned to their classroom, empowered.